
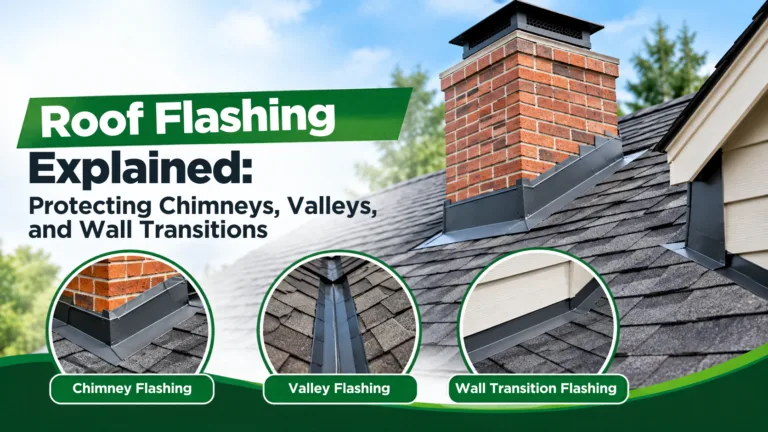
Shingles get most of the attention in a roof discussion, but the metal pieces that seal the roof’s edges and intersections often determine whether the roof stays dry. Flashing covers the joints where the roof meets chimneys, walls, skylights, valleys, and vent pipes. These transitions are natural weak points because water is more likely to pool, run, or find its way underneath at those locations. Understanding how flashing works helps homeowners spot early warning signs and ask informed questions during repairs and replacements.
Flashing is rarely dramatic. It does its job quietly, and it usually fails quietly too. A small gap, a lifted edge, or a failed sealant can allow water into the roof system for months before anyone notices a stain on the ceiling. Regular attention to flashing is one of the most valuable forms of preventive roof care.
How Flashing Directs Water
Good flashing creates a path for water to flow away from a joint. Each piece overlaps the one below it, like the layers of a shingle, so that water running down the roof moves over the flashing rather than under it. When flashing is installed correctly, the overlaps shed water naturally. When it is installed incorrectly or damaged, water can slip beneath it and reach the decking and framing.
Flashing materials commonly include galvanized steel, aluminum, copper, and rubberized membranes. Each has strengths and limitations. Copper resists corrosion well but costs more. Aluminum is lightweight and workable but can be sensitive to certain materials in contact with it. Your contractor should explain which material is used and why.
Chimney Flashing
Chimneys are among the most common sources of roof leaks. The flashing around a chimney typically includes step flashing along the sides, where short pieces are woven into the shingle courses, and a counter flashing embedded into the masonry joint. Improperly sealed mortar joints, cracked caulk, or a lifted counter flashing can allow water into the chimney area. Signs of trouble include staining on the wall near the chimney, rust streaks on the flashing, or cracked sealant along the masonry.
Repairing chimney flashing often requires removing or resetting parts of the counter flashing, which should be done carefully to avoid damaging the masonry. A roofing crew experienced with Roof Installation Services Belton and similar projects can assess whether the chimney needs repointing before new flashing is installed.
Valley Flashing
Valleys are the troughs where two roof slopes meet. They carry a large volume of water, which makes them one of the most demanding areas of a roof. Valleys may be protected with metal flashing laid into the valley, or with woven shingles that interlace across the joint. Open metal valleys tend to shed water well, while woven valleys can be more prone to debris buildup if not maintained. Keep valleys clear of leaves and pine needles, which can trap water and cause it to back up under the shingles. Check for curled shingles along the valley edges, since these can allow water to channel beneath the roof covering. Professionals offering Roof Repair Services Harker Heights regularly inspect valleys because they are such a frequent source of leaks.
Wall Transitions and Step Flashing
Where a sloped roof meets a vertical wall, step flashing is installed in small pieces that overlap each course of shingles. Each piece should be bent to fit the roof slope and tucked behind the siding or wall covering above. If step flashing is nailed too high, or if siding is installed over it incorrectly, water can enter behind the wall. This problem may not appear until the wall has been damaged for some time, making inspection of these transitions important.
Wall transitions are also affected by siding changes, window additions, and exterior remodeling. Any project that alters the wall should prompt a check of the flashing at the roof line.
Vent Pipes, Skylights, and Penetrations
Every pipe, vent, and skylight that passes through the roof creates a penetration that must be sealed. Plumbing vent pipes often use a boot with a rubber collar that fits snugly around the pipe. Over time, the rubber can crack or shrink, allowing water to run down the pipe into the attic. Replacing a failing boot is usually a straightforward repair, but it should be done before the surrounding wood is damaged. Skylight flashing is more complex. Manufacturers provide specific flashing kits, and the installation must be followed precisely. Leaks around skylights are often caused by improper installation or by flashing that was never fully integrated into the roof covering.
Signs of Failing Flashing
Visible signs include rust on metal flashing, cracked or missing sealant, lifted edges, and gaps between the flashing and the roof surface. Inside the home, look for stains on ceilings near the roof joints, bubbling paint, or a damp smell in the attic. Attic inspection is particularly useful, because the decking beneath flashing often shows staining or dark spots before any problem reaches the living space.
Sealant alone is rarely a permanent fix. Caulk and roofing cement can buy time, but they age and crack when exposed to heat and movement. If flashing is damaged or incorrectly installed, the lasting solution is to replace or reset it properly.
Flashing and Roof Replacement
A roof replacement is the best opportunity to correct flashing problems. Old flashing can be removed, the deck inspected, and new flashing installed in the proper sequence with the correct underlayment. Ask your contractor to explain how flashing will be integrated with the new roof covering and whether any components will be replaced rather than reused. Reusing old flashing is sometimes acceptable, but it should be a deliberate decision made after inspection.
Working With a Qualified Crew
Flashing work demands precision, because small errors create leaks that may take months to appear. A qualified crew will follow the correct overlap sequence, use appropriate fasteners, and seal joints without relying on sealant as the primary waterproofing layer. Look for contractors who explain their method and can show examples of similar work. A Roof Installation Services Killeen provider should be able to walk you through each flashing location on your home.
Keeping Flashing Under Watch
Inspect flashing at least once a year, and always after major storms. Check chimneys, valleys, wall transitions, and penetrations from the ground with binoculars, and walk the attic to look for staining. Small problems caught early are far less costly than water damage that has spread into the structure. For a complete review of the roof’s transitions, a Fencing Company in Temple can coordinate with a roofing specialist to inspect the exterior as one system.
Flashing is a small part of the roof with a large responsibility. Careful installation and regular inspection protect the entire roof assembly. Homeowners planning exterior work can also consult a fence contractor in Temple and a Roof Repair Services Temple provider together so that fence, roof, and drainage work are planned in a coordinated way.